
Xelflow Server
How it works

From idea to a professional website on Azure.
Without backend complexity,
deployment concerns, and
security worries.
Xelflow Step-by-Step Plan
- Register with Xelflow for a shared subscription
- Receive the code for an example application with Xelflow admin page
- This is already installed on Azure and available at a random URL
- Get a deployment key for uploading to Azure
- Open the code in your favorite IDE (tested in Antigravity)
- Retrieve an admin key from the Xelflow admin page
- Create a Xelflow key for testing the application
- Upload the application to Azure using the deployment key
- Have a domain linked to your website
Repeat until it is good (enough)
- Create (or generate with AI) your website idea
- Web pages with Html, Css, and Javascript with or without framework
- Flows for backend logic
- Database migration scripts
- Upload the flows to the server using the admin key
- Upload the migration scripts to the server
- Add authorizations via the admin page (optional)
- Add application keys (optional)
- Test the application locally in your IDE
Project Structure
The project architecture is simple and clear.
/api
Azure Functions for keys (GET, POST, DELETE), connections (SSE stream setup), and events.
/flows
JSON definitions of your business logic, organized in folders.
/tables
Database definitions and migration scripts to manage your data model.
/src
The frontend code of your website (HTML/CSS/JS).
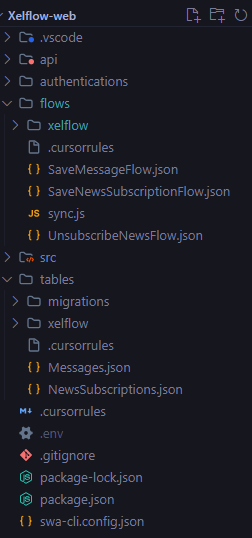
Simple folder structure
Xelflow Admin Pages
A Xelflow Admin Panel for managing Xelflow functionalities, built with Xelflow flows — a great example right away!
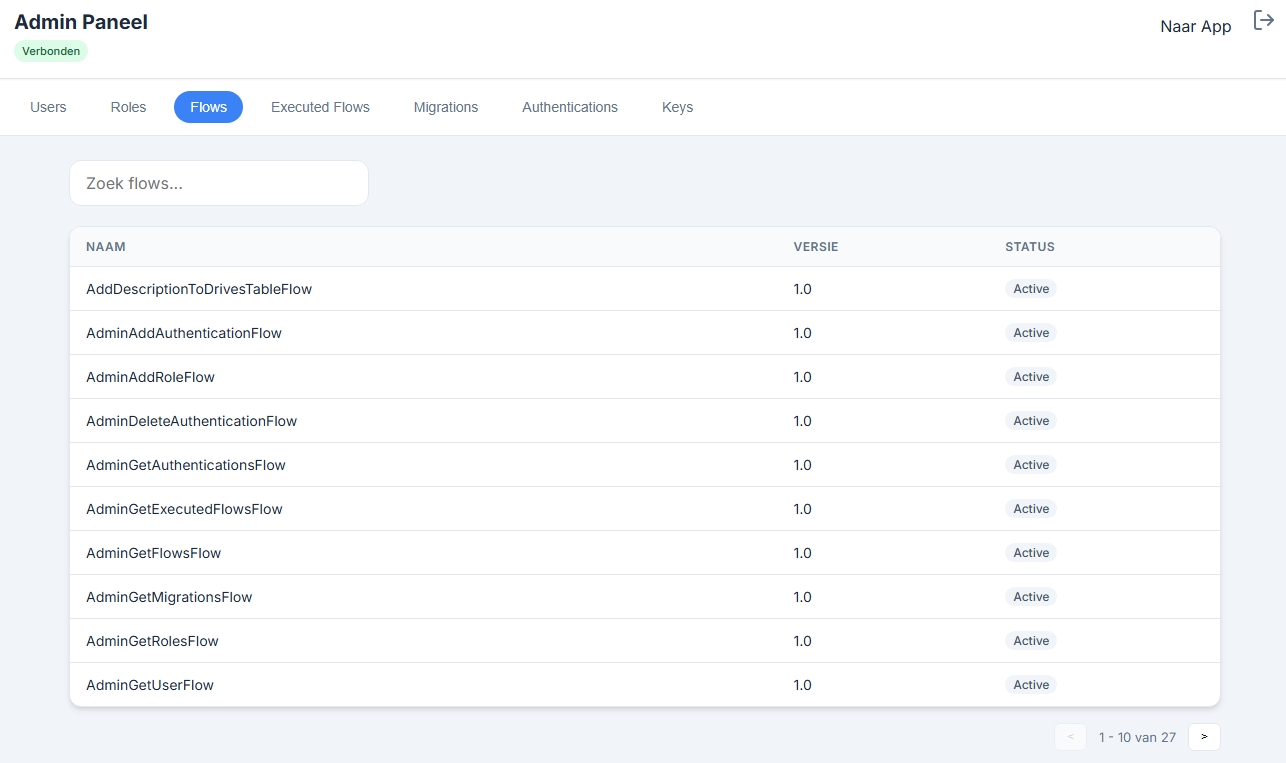
Users & Roles
Manage users, adjust roles (Admin/User or custom roles), and deactivate accounts.
Flow Monitoring
View installed flows and monitor execution with detailed logs.
Configuration
Manage authentications (SMTP, DB, etc.) and generate API keys for local tests or webhooks.
How a Xelflow website works technically
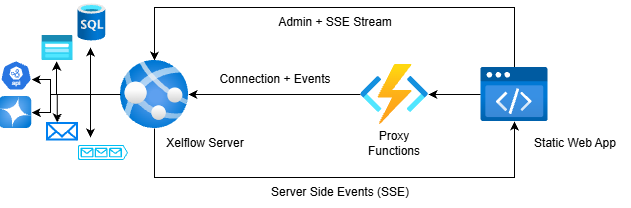
1. Connection & SSE Stream
The website requests a connectionId from the Xelflow Server via
/api/connection. This is then used to set up a direct Server Side Events (SSE)
stream to the Xelflow Server.
2. Events & Validation
The website can then send events to the server. The server checks if the user has the correct role and if the event meets the validation rules.
3. Flow Execution
Upon a valid event, a flow is started. It performs actions such as:
- Query Database
- Send Email
- Http Requests
4. Server Side Events (SSE)
The flow can send messages back to the client via Server Side Events (SSE). Each event has a name and a payload. The website can receive these and perform actions based on the payload.